
Food
What is Carpaccio Beef: Definition and Recipe

What is carpaccio beef is a classic Italian dish made of raw beef, sliced very thin and served with a few simple toppings. It’s known for being light, elegant, and full of flavor even though it’s raw. Traditionally, carpaccio comes from Venice, Italy, and was created in the 1950s. The dish is usually made using tender cuts like beef tenderloin or filet mignon, which are easy to slice thin and very soft in texture.
Making carpaccio beef at home might seem tricky at first, but with the right techniques, you can enjoy it safely. The key is keeping the meat cold, slicing it very thin, and using fresh ingredients to enhance the natural taste. Common toppings include arugula, shaved Parmesan, lemon juice, olive oil, capers, and sometimes shallots. Each element adds freshness, saltiness, or acidity to balance the raw beef.
What is carpaccio beefis more than just a recipe; it’s a way to enjoy beef in its purest form. Knowing how to prepare it properly ensures safety while keeping the dish delicate and flavorful. It’s often served as an appetizer in restaurants but can also be made at home with a few simple tools and careful handling.
Read also: Lolos Seafood Shack Profile
The History of Carpaccio Beef
What is carpaccio beef was first created in the 1950s at Harry’s Bar in Venice. Chef Giuseppe Cipriani invented it for Contessa Amalia Nani Mocenigo, who needed a light, raw beef dish due to her health concerns. He named it “Carpaccio” after the Venetian painter Vittore Carpaccio, known for his vivid red and white colors, reflecting the appearance of the dish.
Originally, it was served with lemon and Parmesan, but over the years, chefs added new variations like arugula, capers, and different oils. Today, carpaccio is a symbol of Italian cuisine worldwide, often featured in fine dining, yet easy enough for home cooks to replicate safely.
Knowing this history helps appreciate the simplicity and elegance behind carpaccio beef. Every element—from the thin slices to the fresh toppings was carefully considered to highlight the natural flavors of raw beef.
Choosing the Right Cut for Carpaccio Beef
The most important step in preparing carpaccio beef is choosing the right cut. The best cuts are tender, lean, and mild in flavor. Common choices include:
- Beef tenderloin: The most popular choice because it is soft and easy to slice thin.
- Filet mignon: A luxurious cut that is extra tender and perfect for raw preparation.
- Eye fillet: Often used in modern variations, offering a balance between flavor and texture.
Avoid tougher cuts, as they will be hard to slice thin and can be chewy. Look for meat that is bright red, fresh, and free from excess fat. Using a semi-frozen piece of beef makes slicing easier and ensures uniform thin slices without tearing the meat.
How to Slice Beef for Carpaccio
Slicing beef correctly is crucial for carpaccio. Thin slices allow the meat to absorb flavors from the toppings and remain tender when eaten raw. Here’s a step-by-step approach:
- Freeze the beef lightly: Chill the meat in the freezer for 30–60 minutes until it is firm but not frozen solid.
- Use a sharp knife: A long, thin, and very sharp knife works best. A slicing knife or chef’s knife is ideal.
- Cut against the grain: This ensures each slice is tender and easy to chew.
- Paper-thin slices: Aim for slices so thin they almost melt in your mouth.
Some chefs use a meat mallet to gently pound the slices thinner after cutting. This method is helpful if the beef is slightly too thick and ensures an even texture throughout.
Traditional Toppings and Pairings
What is carpaccio beef is simple but elegant. The right toppings enhance its natural flavor without overpowering the meat. Common ingredients include:
- Arugula: Adds a peppery bite that balances the richness of beef.
- Parmesan or Parmigiano Reggiano: Shaved thinly to melt slightly on contact with the meat.
- Lemon juice: Gives freshness and a subtle acidity.
- Olive oil: Extra virgin olive oil adds silkiness and aroma.
- Capers: For a salty, briny touch.
- Shallots (optional): Mild onion flavor that complements the meat.
Some modern versions include quail eggs, seared edges, or even truffle oil. However, keeping it simple usually gives the best results and stays true to the Venetian roots of the dish.
Step-by-Step Instructions for Carpaccio Beef
Preparing carpaccio beef at home is simple if you follow the steps carefully:
- Chill the beef in the freezer for 30–60 minutes.
- Slice the beef against the grain as thin as possible.
- Arrange the slices evenly on a chilled platter.
- Drizzle fresh lemon juice and olive oil over the meat.
- Scatter arugula, capers, and Parmesan on top.
- Add optional shallots or quail eggs.
- Season with flaky sea salt and freshly cracked black pepper.
Serve immediately to enjoy the delicate texture and fresh flavors. Avoid leaving raw beef at room temperature for long periods to prevent any food safety issues.
Safety Tips for Eating Raw Beef
Carpaccio beef is delicious but requires careful handling to avoid health risks. Here are some safety tips:
- Buy fresh, high-quality beef: Only use meat labeled safe for raw consumption.
- Keep it cold: Always chill the meat before slicing and serve it on cold plates.
- Use clean tools and surfaces: Prevent contamination by sanitizing knives, cutting boards, and hands.
- Avoid leaving out for long: Raw beef should not sit at room temperature for more than a few minutes.
- Consider freezing briefly: Semi-freezing kills surface bacteria and makes slicing easier.
Following these steps ensures your carpaccio is both safe and enjoyable.
Modern Variations of Carpaccio Beef
While the classic version is raw beef with arugula and Parmesan, there are modern takes:
- Seared edges: Quickly seared beef slices add flavor while keeping the center raw.
- Wagyu upgrade: Using premium Wagyu beef makes the dish richer and more buttery.
- Pickled toppings: Pickled shallots or vegetables add tanginess and contrast.
- Aioli drizzle: Anchovy or garlic aioli gives a creamy, savory twist.
These variations are popular in restaurants but can also be recreated at home safely with the right techniques.
Freezing and Storage Tips
If you need to prepare carpaccio beef ahead of time:
- Freeze beef lightly before slicing to make thin cuts easier.
- Use airtight containers and keep in the fridge for up to one day after slicing.
- Avoid freezing after slicing, as it can ruin texture.
- Prepare toppings separately and add just before serving.
Proper storage preserves both the flavor and safety of the dish.
Pairing Carpaccio Beef with Drinks
Carpaccio beef pairs beautifully with drinks that complement its delicate flavors:
- White wine: Crisp whites like Sauvignon Blanc or Pinot Grigio highlight the freshness.
- Red wine: Light reds like Pinot Noir can also pair well without overpowering.
- Sparkling water: Refreshes the palate and balances richness.
Choosing the right drink enhances the dining experience, making carpaccio feel like a full Italian appetizer course.
Health Benefits of Carpaccio Beef
Even though carpaccio beef is raw, it offers nutritional value:
- High in protein: Tenderloin and filet mignon provide lean protein.
- Low in carbs: A perfect dish for low-carb diets.
- Rich in iron and B vitamins: Supports energy and blood health.
- Healthy fats: Olive oil adds good fats, and Parmesan provides calcium.
Eating it in moderation and following safety precautions makes it a healthy, elegant appetizer.
Common Mistakes to Avoid
When making carpaccio beef, watch out for these pitfalls:
- Using the wrong cut that is too tough or fatty.
- Slicing the meat too thick, which makes it chewy.
- Serving at room temperature for too long.
- Overloading toppings that hide the beef’s flavor.
- Using dull knives, which can tear the meat.
Avoiding these mistakes ensures a smooth, safe, and delicious dish every time.
Tips for Perfect Presentation
Carpaccio beef isn’t just about taste; presentation matters:
- Use a chilled plate to keep meat cool.
- Arrange slices neatly in overlapping layers.
- Sprinkle toppings evenly and lightly.
- Add microgreens or herbs for color.
- Use a light drizzle of oil or lemon juice for shine.
A visually appealing plate enhances the dining experience and keeps it close to the classic Italian style.
Conclusion
What is carpaccio beef is a simple yet elegant dish that celebrates raw beef in its purest form. Understanding its history, using the right cuts, and following proper preparation techniques ensures both flavor and safety. Whether sticking to the traditional Venetian recipe with tenderloin, Parmesan, and arugula or exploring modern variations like seared edges or Wagyu upgrades, carpaccio beef offers a refined, fresh, and protein-rich appetizer suitable for home or restaurant dining. With the tips above, anyone can enjoy this delicate Italian classic safely and beautifully at home.
FAQs
What is carpaccio beef made from?
It’s usually made from tender cuts like beef tenderloin or filet mignon, sliced very thin.
Can I make carpaccio beef at home safely?
Yes, if you use fresh, high-quality meat, keep it cold, and follow proper slicing and hygiene.
What toppings are traditional for carpaccio beef?
Arugula, shaved Parmesan, lemon juice, olive oil, capers, and optional shallots.
How thin should the slices be?
Slices should be paper-thin, almost melting in your mouth.
Can I freeze carpaccio beef after slicing?
No, freezing after slicing can ruin the texture. Freeze only before slicing if needed.
What drinks pair well with carpaccio beef?
Light red or white wines and sparkling water complement its delicate flavors.
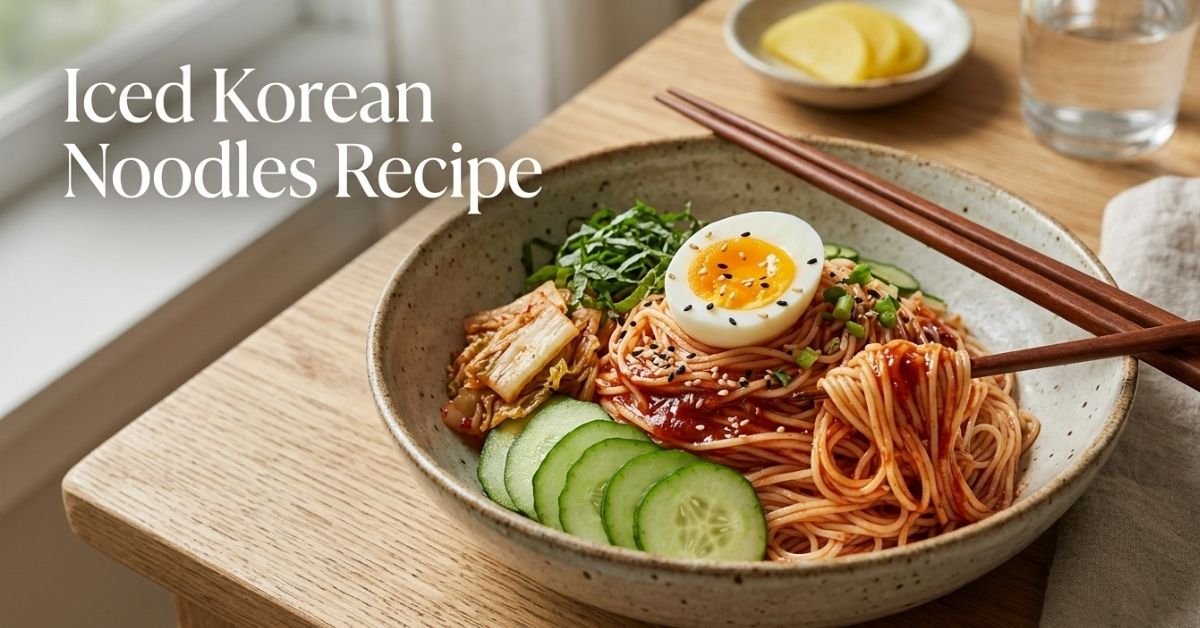
Iced Korean noodles are a refreshing dish commonly enjoyed during hot weather in Korea. These chilled noodles are usually served with a spicy, sweet, and tangy sauce made with gochujang, garlic, sesame oil, and vinegar. The noodles are cooled in ice water after cooking, which gives them a firm and chewy texture that makes the dish incredibly satisfying on warm days. Many people search for an iced Korean noodles recipe because it offers a quick meal that feels light yet flavorful.
The dish most commonly associated with iced Korean noodles is bibim guksu, a spicy cold noodle dish made with thin wheat noodles called somyeon. Another popular variation is naengmyeon, which uses buckwheat noodles and can be served either in a chilled broth or with spicy sauce. Both dishes highlight the balance of flavors that Korean cuisine is known for. Sweet, spicy, sour, and nutty elements combine to create a refreshing bowl that cools the body while still delivering bold taste.
One of the reasons this dish has become popular globally is its flexibility. It can be made vegetarian, vegan, or with protein such as boiled egg, shredded chicken, or tofu. Fresh toppings like cucumber, kimchi, and pear add texture and brightness. Because the recipe is simple and requires minimal cooking time, it is perfect for beginners who want to try Korean cooking at home.
Read also: Authentic Taiwanese Red Braised Pork Belly Recipe
Bibim Guksu vs Naengmyeon
When exploring an iced Korean noodles recipe, it is helpful to understand the difference between the two most famous Korean cold noodle dishes. Both are served cold but they differ in ingredients, flavor, and preparation style. Knowing the differences helps you choose the right noodles and sauce for the dish you want to recreate.
Bibim guksu is the spicy version of cold noodles. It uses thin wheat noodles mixed with a bright red sauce made from gochujang, vinegar, sugar, sesame oil, and garlic. The flavor is bold and slightly sweet with a pleasant tang. It is usually topped with sliced cucumber, kimchi, sesame seeds, and half a boiled egg. This dish is often served without broth, which allows the spicy sauce to coat every strand of noodles.
Naengmyeon, on the other hand, often uses buckwheat noodles and can be served in a cold broth known as mul naengmyeon or with spicy sauce called bibim naengmyeon. The broth version includes icy beef or radish broth that makes the dish extremely refreshing. The spicy version resembles bibim guksu but usually has a stronger chili flavor and slightly different toppings such as Korean pear and pickled radish.
Comparison overview
• Bibim guksu: thin wheat noodles, spicy gochujang sauce, no broth
• Mul naengmyeon: buckwheat noodles, cold savory broth, mild flavor
• Bibim naengmyeon: buckwheat noodles with spicy chili sauce
• Bibim guksu: lighter and easier for home cooking
• Naengmyeon: more traditional restaurant style dish
For home cooks, bibim guksu is usually the easiest iced Korean noodles recipe to prepare because it requires fewer ingredients and no broth preparation.
Ingredients for Authentic Iced Korean Noodles
A great iced Korean noodles recipe relies on a balance of spicy, sweet, sour, and nutty flavors. Most of the ingredients are easy to find in Asian grocery stores and many are now available in regular supermarkets. Using fresh vegetables and quality noodles will improve the final texture and taste of the dish.
The noodles used are usually somyeon, which are thin wheat noodles similar to angel hair pasta. They cook quickly and absorb the spicy sauce beautifully. The sauce is built around gochujang, a fermented Korean chili paste that provides heat and depth. Fresh vegetables add crunch while sesame oil and sesame seeds give a nutty aroma.
Ingredients
• 200 grams somyeon noodles
• 1 tablespoon gochujang Korean chili paste
• 1 tablespoon soy sauce
• 1 tablespoon rice vinegar
• 1 tablespoon sugar or honey
• 1 teaspoon sesame oil
• 1 clove garlic minced
• 1 teaspoon gochugaru Korean chili flakes
• ½ cucumber thinly sliced
• ¼ cup kimchi chopped
• 1 boiled egg cut in half
• 1 tablespoon sesame seeds
• Optional toppings: shredded chicken, tofu, pear slices, or radish
These ingredients create the classic spicy flavor profile associated with bibim guksu. The balance between vinegar and sugar is especially important because it gives the noodles their refreshing taste.
Step By Step Cooking Instructions
Making iced Korean noodles at home is simple and usually takes less than twenty minutes. The key technique is cooling the noodles properly so they become chewy and refreshing rather than soft and sticky. Once the noodles are chilled, they are tossed with sauce and topped with vegetables.
Steps
• Bring a pot of water to a boil and cook the somyeon noodles according to package instructions, usually about three to four minutes.
• Drain the noodles and immediately rinse them under cold running water to stop the cooking process.
• Place the rinsed noodles in a bowl of ice water for about one minute to chill them completely.
• Drain well and gently squeeze out excess water so the sauce will stick to the noodles.
• In a separate bowl mix gochujang, soy sauce, rice vinegar, sugar, sesame oil, garlic, and gochugaru.
• Add the chilled noodles to the sauce and toss until evenly coated.
• Transfer the noodles to a serving bowl and arrange cucumber slices, kimchi, and egg on top.
• Sprinkle sesame seeds over the dish and serve immediately.
This method keeps the noodles firm and prevents them from clumping. The cold temperature also enhances the refreshing qualities of the dish.
Choosing the Best Noodles for Cold Korean Dishes
The type of noodles used can greatly affect the final texture of your iced Korean noodles recipe. Traditional Korean cold noodles use somyeon or buckwheat noodles, but several alternatives can work if those are not available. Understanding the characteristics of each option helps ensure the dish still tastes authentic.
Somyeon noodles are thin wheat noodles that cook quickly and remain slightly chewy even after being chilled. They are the most common choice for bibim guksu and are ideal for absorbing spicy sauce. Buckwheat noodles are used for naengmyeon and have a darker color and slightly nutty flavor. They are often firmer and slightly more elastic.
Good noodle alternatives include:
• Soba noodles
• Thin wheat noodles
• Angel hair pasta in emergencies
• Gluten free rice noodles
• Sweet potato starch noodles for a chewier texture
If using substitutes, it is still important to rinse them in cold water after cooking. This step removes excess starch and creates the signature firm texture that cold Korean noodles are known for.
Popular Toppings and Garnishes
Toppings are an essential part of an iced Korean noodles recipe because they add freshness, color, and texture. The contrast between cool vegetables and spicy sauce creates a balanced bowl that feels light but still satisfying. Korean cuisine often uses simple toppings that highlight natural flavors rather than overpowering the noodles.
Cucumber is the most common topping because its crisp texture pairs well with spicy sauce. Kimchi adds fermented depth and mild heat, while sesame seeds provide a nutty finish. Boiled egg is often used to add protein and richness. Some versions also include thin slices of Korean pear, which bring subtle sweetness and extra freshness.
Popular toppings include
• Julienned cucumber
• Chopped kimchi
• Boiled egg halves
• Korean pear slices
• Pickled radish
• Sesame seeds
• Shredded chicken
• Grilled beef strips
• Pan fried tofu
Mixing different toppings allows you to customize the dish depending on your taste preferences or dietary needs.
Vegan and Gluten Free Variations
Many people look for a vegan version of an iced Korean noodles recipe because the dish already contains many plant based ingredients. With a few small adjustments, the recipe can easily become vegan and still maintain authentic flavor. This flexibility is one reason cold Korean noodles have become popular among home cooks.
To make the dish vegan, simply remove the boiled egg and replace it with plant based protein. Tofu works particularly well because it absorbs sauce and adds satisfying texture. Kimchi should also be checked carefully because some versions contain fish sauce. Vegan kimchi is widely available in many grocery stores.
Gluten free adjustments are also possible. The easiest method is replacing wheat noodles with rice noodles or gluten free soba noodles. Tamari can be used instead of regular soy sauce to avoid gluten while maintaining the same salty flavor.
Diet friendly variations
• Vegan version with tofu and vegan kimchi
• Gluten free version using rice noodles and tamari
• High protein version with chicken or tofu
• Mild kid friendly version with less gochujang
• Low calorie version with extra vegetables
These variations allow the dish to suit many dietary preferences without sacrificing the refreshing taste.
Nutrition and Health Benefits
A bowl of iced Korean noodles can be surprisingly balanced when prepared with fresh vegetables and moderate sauce. The dish provides carbohydrates for energy, vitamins from vegetables, and protein if eggs or meat are included. Because the dish is served cold and often includes raw vegetables, it also feels lighter than many hot noodle meals.
The gochujang sauce contains fermented ingredients that contribute to deep flavor. Fermented foods are often associated with beneficial probiotics, although the amount can vary depending on processing. Sesame seeds and sesame oil add healthy fats that help the body absorb fat soluble nutrients from vegetables.
Approximate nutrition per serving
• Calories around 350 to 420
• Protein 10 to 18 grams depending on toppings
• Carbohydrates about 55 grams
• Fat around 8 to 12 grams
• Fiber about 3 to 5 grams
Adding vegetables such as cucumber, radish, and cabbage increases fiber and nutrients while keeping calories relatively low.
Meal Prep and Storage Tips
An iced Korean noodles recipe is perfect for meal prep because several components can be prepared ahead of time. The sauce can be mixed and stored in the refrigerator for several days, and vegetables can be sliced in advance. This makes it easy to assemble the dish quickly when you are ready to eat.
However, noodles should ideally be cooked fresh because they can become sticky if stored for too long. If necessary, they can be cooked earlier in the day and rinsed thoroughly with cold water before refrigeration. A small amount of sesame oil can help prevent sticking.
Storage tips
• Keep sauce in a sealed container for up to five days
• Store sliced vegetables separately to maintain freshness
• Cook noodles fresh whenever possible
• Assemble the dish right before serving
• Avoid freezing because texture will change
Following these steps helps maintain the refreshing taste and chewy texture that define the dish.
Serving Ideas and Korean Pairings
Cold Korean noodles are often served as a complete meal, but they can also be paired with small side dishes known as banchan. These sides add extra flavors and textures that complement the spicy noodles. In Korean cuisine, meals often include a variety of small plates that create a balanced table.
Simple vegetable sides work especially well because they keep the meal light. Pickled radish, kimchi, and cucumber salad add acidity that balances the spicy sauce. Grilled meats are also commonly paired with cold noodles because the cool noodles provide contrast to hot barbecue dishes.
Great pairings include
• Kimchi or fermented vegetables
• Pickled radish slices
• Korean cucumber salad
• Grilled Korean barbecue beef
• Steamed dumplings
• Light vegetable pancakes
Serving the noodles with chilled tea or sparkling water also enhances the refreshing experience during hot weather.
Common Cooking Mistakes to Avoid
Even though an iced Korean noodles recipe is simple, a few mistakes can affect the final texture and flavor. Many beginners skip important steps like rinsing the noodles properly or balancing the sauce ingredients. Paying attention to these details will help you achieve the best results.
One common mistake is overcooking the noodles. Because somyeon noodles are very thin, they cook quickly and can become mushy if left in boiling water too long. Another mistake is not rinsing the noodles thoroughly after cooking. Cold rinsing removes starch and creates the chewy texture that defines the dish.
Common mistakes
• Overcooking the noodles
• Skipping the cold water rinse
• Adding too much sauce at once
• Using warm noodles instead of chilled
• Forgetting acidic balance from vinegar
Fixing these small details ensures your noodles stay refreshing and flavorful every time.
Conclusion
Cold noodle dishes are a wonderful example of how Korean cuisine balances flavor, texture, and temperature. With simple ingredients and quick preparation, anyone can recreate this refreshing meal at home. Once you learn the basic technique, you can easily experiment with toppings, protein choices, and spice levels. A well prepared iced Korean noodles recipe delivers a perfect mix of spicy sauce, chewy noodles, and crisp vegetables that make it ideal for warm weather meals.
FAQs
What are iced Korean noodles called?
They are usually called bibim guksu or naengmyeon depending on whether they are served with spicy sauce or cold broth.
What noodles are used for Korean cold noodles?
Somyeon wheat noodles are common for bibim guksu, while buckwheat noodles are used for naengmyeon.
Are Korean cold noodles healthy?
They can be healthy when prepared with vegetables and moderate sauce, providing balanced carbohydrates and nutrients.
Can iced Korean noodles be vegan?
Yes. Simply remove egg and use tofu or vegetables while ensuring the kimchi is vegan.
How spicy are bibim guksu noodles?
They are moderately spicy due to gochujang but the heat level can be adjusted easily.
Can I make the sauce ahead of time?
Yes. The sauce can be stored in the refrigerator for several days and mixed with noodles when ready to serve.
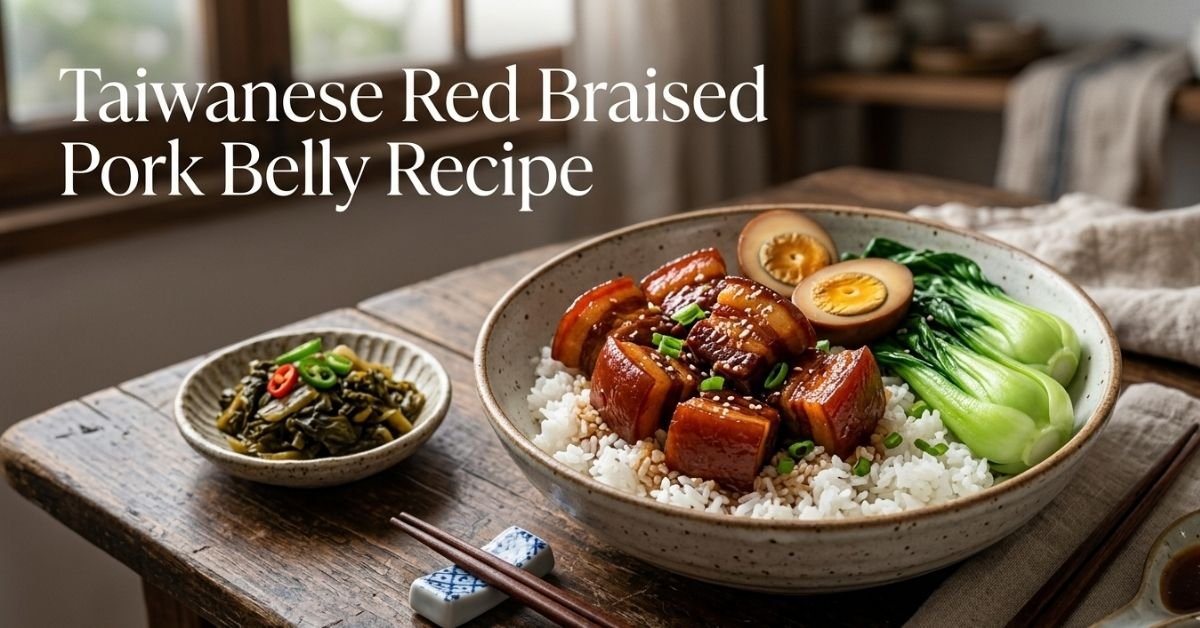
Taiwanese red braised pork belly is one of the most comforting dishes in Taiwanese home cooking. It is commonly known as Lu Rou Fan and is served as small cubes of pork belly simmered slowly in a fragrant soy based sauce. The sauce contains ingredients such as dark soy sauce, rock sugar, garlic, ginger, and warm spices like star anise. When the pork cooks slowly, the fat and collagen break down and create a rich sauce that coats every piece of meat. The finished dish is typically spooned generously over a bowl of steamed rice, turning a simple meal into something deeply satisfying.
In Taiwan this dish appears everywhere from family kitchens to busy night markets. Vendors often keep large pots simmering for hours, allowing the sauce to deepen in flavor as more pork is added throughout the day. The result is a glossy reddish brown stew that smells warm and slightly sweet. The flavor is balanced between salty soy sauce, caramel sweetness, and aromatic spices. The soft pork belly almost melts when eaten with rice, which explains why the dish is considered a classic comfort food.
Another important part of the experience is the combination of textures. The sauce becomes slightly thick and silky because of the collagen released from pork belly during braising. When spooned over rice, it seeps into the grains and creates layers of flavor in every bite. Some versions include braised eggs or mushrooms, which absorb the sauce and add even more depth to the bowl.
Read also: Best Smoked Shotgun Shell Recipe for BBQ Lovers
Essential Ingredients for Authentic Flavor
A traditional Taiwanese red braised pork belly recipe relies on a short but powerful ingredient list. Each component contributes to the balance between savory, sweet, and aromatic flavors. Using authentic ingredients helps recreate the taste found in Taiwanese street food stalls and home kitchens.
Key ingredients typically include:
• Pork belly with skin
• Light soy sauce
• Dark soy sauce for color
• Rock sugar or brown sugar
• Garlic cloves
• Fresh ginger slices
• Star anise pods
• Chinese five spice powder
• Shaoxing rice wine
• Fried shallots
• Water or broth
• Hard boiled eggs optional
• Dried shiitake mushrooms optional
Pork belly is the star ingredient because its layers of fat and meat create the rich texture that defines the dish. When slowly braised, the fat becomes silky rather than greasy. Dark soy sauce is especially important because it gives the dish its signature deep reddish brown color while adding mild sweetness.
Rock sugar is traditionally used instead of regular sugar. It melts slowly and produces a smooth caramel flavor without making the sauce overly sweet. Fried shallots are another distinctive ingredient often used in Taiwanese cooking because they provide a subtle roasted aroma that enhances the entire braise.
Preparing the Pork Belly Before Cooking
Proper preparation is essential for achieving tender pork belly and a clean tasting braising sauce. Many traditional cooks begin by blanching the pork briefly before the braising process begins. This step removes impurities from the meat and results in a clearer sauce.
To prepare the pork belly properly:
• Cut pork belly into small cubes about 2 cm wide
• Place the pieces in boiling water for 2 to 3 minutes
• Remove and rinse with warm water
• Pat dry before cooking
Blanching is optional but recommended if the pork contains visible impurities or bone fragments. The short boil removes excess blood and helps create a smoother final sauce. After blanching, the pork is ready for browning, which develops flavor through caramelization.
Some cooks skip this step and instead sear the pork directly in a wok. Both methods work well. Blanching simply produces a cleaner broth while direct searing creates a deeper roasted flavor.
Traditional Braising Method on the Stovetop
The stovetop method remains the most authentic way to prepare Taiwanese red braised pork belly. It allows the cook to control heat gradually while the sauce develops complex flavor. The key idea is to simmer gently for a long time so the pork becomes tender.
Basic cooking steps include:
• Heat a wok or pot with a little oil
• Add rock sugar and cook until lightly caramelized
• Add pork belly cubes and stir until slightly browned
• Add garlic, ginger, and star anise
• Pour in soy sauces and rice wine
• Add water until pork is partially covered
• Simmer on low heat for about 60 to 90 minutes
• Stir occasionally and adjust seasoning
As the pork cooks, the sauce slowly thickens and coats the meat. The slow cooking process allows collagen to dissolve into gelatin, which creates the silky mouthfeel associated with authentic braised pork rice. Patience during this stage is essential because rushing the process prevents the pork from reaching its signature tender texture.
How to Achieve Melt In Mouth Texture
The famous tenderness of Taiwanese braised pork comes from proper braising technique. Pork belly contains connective tissue that must break down slowly in order to become soft and succulent. Temperature control is therefore extremely important.
Several tips help achieve the ideal texture:
• Use low gentle simmering heat
• Allow at least 60 to 90 minutes cooking time
• Keep the pot partially covered
• Stir occasionally to prevent sticking
• Avoid boiling rapidly
When the braise is done correctly, the pork becomes soft enough to cut with chopsticks. The fat layers should appear translucent rather than greasy. This transformation happens when collagen slowly converts into gelatin, which thickens the sauce naturally.
Cooking longer often improves the dish even further. Many home cooks allow the braise to simmer for up to two hours so the sauce becomes richer and more concentrated.
Adding Hard Boiled Eggs and Mushrooms
Many Taiwanese households include additional ingredients that absorb the flavorful braising liquid. Two common additions are hard boiled eggs and dried shiitake mushrooms. Both ingredients soak up the soy based sauce and create delicious variations within the same dish.
Popular add ins include:
• Hard boiled eggs peeled before adding
• Dried shiitake mushrooms soaked in water
• Fried tofu cubes
• Bamboo shoots
The eggs gradually turn brown as they absorb the sauce, creating a beautiful marbled appearance. Mushrooms contribute an earthy flavor that deepens the umami profile of the braise. These additions also help stretch the dish to feed more people without increasing the amount of pork required.
Many night market vendors include these ingredients because they add variety to each bowl of braised pork rice.
Instant Pot and Pressure Cooker Method
Modern kitchens often rely on pressure cookers to reduce cooking time. Fortunately Taiwanese red braised pork belly adapts well to this method while still producing tender meat. The pressure cooker speeds up the collagen breakdown process.
To cook using a pressure cooker:
• Saute pork belly with sugar and aromatics
• Add soy sauce, wine, and water
• Seal the lid and cook on high pressure for 30 minutes
• Allow natural pressure release for 10 minutes
• Simmer briefly to thicken the sauce
Although the cooking time is shorter, the flavor remains rich because pressure cooking traps steam and intensifies aromas. This method is especially helpful for busy cooks who want authentic flavor without waiting two hours for the braise to finish.
After pressure cooking, the sauce can be reduced for a few minutes to achieve the glossy consistency typical of traditional Lu Rou Fan.
Serving the Dish with Rice and Side Dishes
The traditional way to serve Taiwanese red braised pork belly is over freshly steamed rice. The sauce is spooned generously over the rice so every grain absorbs the savory liquid. The result is a deeply comforting rice bowl that feels both simple and luxurious.
Common serving elements include:
• Steamed white rice
• Pickled mustard greens
• Blanched bok choy
• Braised eggs
• Chili oil for extra spice
These additions balance the richness of the pork. Fresh vegetables add brightness while pickled greens introduce acidity that cuts through the fatty texture. Many Taiwanese families prepare this meal as a quick dinner because the braised pork can be cooked earlier and reheated easily.
A small bowl of soup is also often served alongside the rice bowl, creating a complete and satisfying meal.
Nutrition and Cost Considerations
Despite its indulgent taste, braised pork rice can fit into a balanced meal when served in moderate portions. Pork belly provides protein and energy while rice supplies carbohydrates for sustained energy. The dish is quite rich because of its fat content, so smaller servings are usually sufficient.
Approximate nutrition per serving may include:
• Calories around 450 to 500
• Protein about 18 grams
• Fat roughly 30 grams
• Carbohydrates about 30 grams
The cost of preparing this dish at home is generally affordable. Pork belly is usually less expensive than premium cuts of meat, and the remaining ingredients such as soy sauce, garlic, and spices are pantry staples used in many Asian recipes.
Cooking at home therefore allows families to enjoy a restaurant style comfort dish while controlling both ingredients and portion sizes.
Storage, Freezing, and Reheating Tips
One advantage of braised dishes is that they store very well. In fact, many cooks believe Taiwanese red braised pork belly tastes even better the next day because the sauce has more time to absorb into the meat.
Proper storage tips include:
• Refrigerate leftovers within two hours
• Store in an airtight container
• Keep in refrigerator up to four days
• Freeze for up to two months
To reheat, place the pork and sauce in a small saucepan and warm gently over medium low heat. Adding a few tablespoons of water prevents the sauce from becoming too thick. Frozen portions should thaw overnight in the refrigerator before reheating.
These storage techniques make the dish excellent for meal preparation because a single batch can provide several meals throughout the week.
Common Mistakes to Avoid When Cooking
Although the recipe appears simple, a few common mistakes can affect the final result. Avoiding these errors ensures the pork becomes tender and the sauce develops balanced flavor.
Frequent mistakes include:
• Cooking at high heat which toughens the pork
• Using lean pork instead of pork belly
• Adding too much soy sauce early
• Skipping caramelization of sugar
• Over reducing the sauce
Another common issue is using regular sugar incorrectly. Rock sugar melts gradually and produces a more delicate sweetness, while granulated sugar can sometimes create a harsher caramel flavor if overheated.
Taking time with the braising process and tasting the sauce during cooking helps prevent these problems.
Flavor Variations and Dietary Adaptations
Although traditional Taiwanese braised pork follows a specific flavor profile, many cooks adjust the recipe according to personal preferences or dietary needs. These variations allow the dish to remain accessible while still respecting its classic roots.
Possible variations include:
• Spicy version with dried chili peppers
• Low sodium version using reduced sodium soy sauce
• Gluten free version using tamari instead of soy sauce
• Mushroom based vegetarian adaptation
• Extra aromatic version with cinnamon stick
Vegetarian adaptations replace pork with mushrooms or tofu while keeping the same braising sauce. Although the texture differs, the rich soy based flavor remains similar and still pairs beautifully with rice.
These adjustments demonstrate how a traditional recipe can evolve while preserving its comforting character.
Conclusion
Taiwanese red braised pork belly is a beloved comfort dish known for its tender texture and deeply savory sauce. Slow braising transforms simple ingredients into a rich meal that pairs perfectly with steamed rice. By using authentic aromatics, controlling cooking temperature, and allowing enough time for collagen to break down, anyone can recreate this classic dish at home. Whether prepared using the traditional stovetop method or a modern pressure cooker, the Taiwanese Red Braised Pork Belly Recipe delivers satisfying flavor that reflects the heart of Taiwanese home cooking.
FAQs
What is Taiwanese braised pork rice called?
It is called Lu Rou Fan, a popular Taiwanese rice bowl topped with braised pork belly.
Do you need to blanch pork belly before braising?
Blanching is optional but helps create a cleaner tasting sauce.
How long should pork belly braise?
Typically 60 to 90 minutes on the stovetop for tender texture.
Can Lu Rou Fan be made ahead of time?
Yes, the flavor often improves after resting overnight.
What sugar is best for this dish?
Rock sugar is traditional because it melts slowly and creates smooth sweetness.
Can the dish be frozen?
Yes, braised pork belly freezes well for up to two months.

Smoked Shotgun Shell Recipe are a popular BBQ appetizer made by stuffing manicotti pasta tubes with a rich mixture of meat, cheese, and seasonings, then wrapping them in bacon and smoking them slowly until tender and flavorful. The name comes from the shape of the pasta once it is filled and wrapped, which resembles a shotgun shell. Despite the playful name, the dish is simply a creative way to combine pasta, smoky meat, and melted cheese into one satisfying bite sized snack.
This recipe became popular in backyard barbecue communities because it delivers bold flavors while still being easy to prepare. The filling often includes ground sausage, cream cheese, shredded cheddar, and barbecue seasoning. Once the manicotti shells are stuffed, they are wrapped with bacon strips that crisp during smoking while the inside becomes creamy and savory. When glazed with barbecue sauce near the end of cooking, the shells develop a sticky outer layer that adds sweetness and balance.
Another reason people enjoy this dish is its versatility. Different meats, cheeses, and sauces can be used to create new flavor combinations. It works well for tailgate parties, backyard cookouts, and game day gatherings. Because the recipe can be prepared ahead of time, many cooks assemble the shells the night before so the pasta softens slightly before smoking. This preparation step helps the shells cook evenly without boiling them first.
Read also: Buffalo Chicken Dip Crock Pot Recipe for Parties
Ingredients for a Classic Smoked Shotgun Shell Recipe
A successful smoked shotgun shell recipe starts with the right ingredients. The goal is to balance meat, cheese, and seasoning so the filling remains creamy while the bacon becomes crisp. Fresh ingredients and good barbecue seasoning make a noticeable difference in the final flavor.
Common ingredients used for the recipe include:
• 12 manicotti pasta shells
• 1 pound ground Italian sausage or pork sausage
• 4 ounces cream cheese softened
• 1 cup shredded cheddar cheese
• 1 tablespoon BBQ rub or seasoning
• 12 slices thin bacon
• 1 jalapeno finely chopped optional
• ½ cup barbecue sauce for glazing
• 1 teaspoon garlic powder
• 1 teaspoon onion powder
• Fresh parsley for garnish optional
The combination of sausage and cream cheese creates a rich filling that stays moist during smoking. Cheddar cheese melts into the mixture and adds a slightly sharp flavor that pairs well with smoky bacon. Jalapenos are optional but many cooks enjoy the mild heat they bring to the dish.
Barbecue sauce is typically brushed on during the last stage of cooking. This helps create a sticky glaze without burning the sugars in the sauce too early. Some cooks prefer sweet sauces while others choose spicy or smoky varieties depending on personal taste.
Preparing the Filling and Stuffing the Manicotti Shells
Before smoking begins, the filling needs to be mixed and packed inside the manicotti shells. This step determines the texture of the finished dish, so it helps to mix the ingredients evenly without overworking the meat mixture.
Start by combining the sausage, cream cheese, cheddar cheese, and seasonings in a large mixing bowl. Use clean hands or a spoon to blend everything together until the ingredients form a smooth mixture. The cream cheese should be soft so it spreads easily through the sausage.
To fill the shells, the mixture can be placed into a piping bag or a plastic bag with the corner cut off. This makes it easier to push the filling through the hollow pasta tube. Another method is to carefully press the filling into each shell using your fingers, ensuring the entire tube is packed from end to end.
Once the shells are filled, wrap each manicotti with one slice of bacon. The bacon should overlap slightly to hold everything together while cooking. The ends of the pasta should be fully covered to prevent the filling from leaking during smoking. After wrapping, place the shells on a tray and sprinkle a little extra BBQ rub on top for additional flavor.
Smoking Temperature and Cooking Time Guide
The key to a perfect smoked shotgun shell recipe is cooking the shells slowly at the right temperature. Smoking allows the pasta to soften while the bacon cooks and the filling becomes juicy and flavorful.
Typical smoking settings include:
• Smoker temperature: 250°F
• Cooking time: 90 minutes to 2 hours
• Internal meat temperature target: 165°F
• Sauce glazing time: last 20 minutes
Place the prepared shells on the smoker grate with space between each piece so the smoke can circulate. The shells should cook slowly until the bacon becomes firm and the meat inside reaches a safe internal temperature. During the final stage of cooking, brush barbecue sauce on the shells to create a flavorful glaze.
Cooking time may vary slightly depending on the smoker type and the thickness of the bacon used. Thicker bacon can require extra time, while thinner slices crisp faster.
Best Wood Choices for Smoking Shotgun Shells
Wood selection affects the flavor of smoked foods, and shotgun shells benefit from a balanced smoke profile. Strong wood flavors can overpower the cheese filling, so mild to medium woods are usually recommended.
Popular smoking wood choices include:
• Hickory for bold classic barbecue flavor
• Applewood for mild sweetness
• Cherry wood for a slightly fruity aroma
• Pecan wood for smooth nutty smoke
Many pitmasters combine woods to create a balanced flavor profile. For example, mixing applewood with hickory gives both sweetness and traditional BBQ smoke. The goal is to enhance the bacon and sausage without overwhelming the creamy filling inside the pasta.
Pellet grills, charcoal smokers, and offset smokers can all be used successfully. Maintaining steady temperature and consistent airflow is more important than the specific type of smoker used.
Do You Need to Boil the Manicotti Shells First
One common question about this recipe is whether the pasta shells must be boiled before smoking. The answer is usually no. Many experienced cooks skip boiling because the moisture from the filling slowly softens the pasta during cooking.
When the shells sit overnight in the refrigerator after being filled, the pasta begins to absorb moisture from the meat mixture. This pre softening process allows the shells to cook perfectly in the smoker without becoming mushy.
However, if someone plans to cook the shells immediately after stuffing them, a quick partial boil of two to three minutes can help soften the pasta slightly. The shells should still be firm because they will continue cooking while smoking.
The overnight method remains the most reliable approach because it produces tender pasta while keeping the filling sealed inside.
Make Ahead Preparation Tips for Parties
Smoked shotgun shells are popular for parties because they can be prepared well before guests arrive. Preparing them ahead of time reduces stress during the event and ensures consistent results when cooking begins.
Helpful preparation tips include:
• Assemble shells the night before cooking
• Store covered in the refrigerator for 8 to 24 hours
• Allow shells to sit at room temperature for 15 minutes before smoking
• Prepare sauce and garnishes in advance
Resting overnight not only saves time but also improves texture because the pasta softens naturally. This technique also allows the seasoning to blend through the meat filling, creating deeper flavor.
For large gatherings, shells can be arranged on trays in batches and transferred directly to the smoker when ready to cook.
Flavor Variations to Try at Home
While the classic smoked shotgun shell recipe uses sausage and cheddar cheese, many cooks enjoy experimenting with different ingredients. Small changes in filling ingredients can create completely new flavors.
Popular variations include:
• Spicy version with pepper jack cheese and jalapenos
• Tex Mex style with taco seasoning and ground beef
• BBQ brisket version using chopped smoked brisket
• Chicken version using ground chicken and mozzarella
• Cream cheese and chorizo combination for extra spice
These variations allow the recipe to match different tastes or meal themes. Adding herbs, roasted peppers, or caramelized onions can also introduce new flavor layers while keeping the same basic cooking technique.
Troubleshooting Common Shotgun Shell Problems
Even simple recipes can present small challenges during cooking. Understanding a few common issues can help avoid problems and produce better results every time.
Common problems and solutions include:
• Pasta still hard after cooking
Increase resting time before smoking so the shells absorb moisture from the filling.
• Bacon not crisp
Use thinner bacon or increase smoker temperature slightly near the end.
• Filling leaking out
Wrap bacon tightly and ensure shells are fully packed with filling.
• Shells drying out
Apply barbecue sauce during the final stage and avoid cooking too long.
• Uneven cooking
Rotate the tray halfway through smoking for balanced heat exposure.
Learning these adjustments helps improve consistency and ensures the shells come out tender and flavorful each time they are prepared.
Serving Ideas and Dipping Sauce Pairings
Once the shells finish smoking, they should rest for about five minutes before serving. This allows the filling to settle slightly while keeping the cheese creamy inside.
Smoked shotgun shells pair well with several dipping sauces:
• Ranch dressing
• Garlic aioli
• Chipotle mayo
• Honey mustard
• Extra barbecue sauce
For presentation, the shells can be sliced in half to reveal the cheesy filling inside. This makes them easier to serve as finger food during parties and gatherings. Garnishing with chopped parsley or green onions also adds color and freshness to the plate.
They can be served with simple sides like pickles, grilled vegetables, or coleslaw to balance the richness of the dish.
Storage, Freezing, and Reheating Tips
Leftover smoked shotgun shells can be stored safely and reheated later. Proper storage keeps the pasta and filling from drying out while preserving flavor.
Storage guidelines include:
• Refrigerate leftovers in an airtight container for up to 3 days
• Freeze cooked shells for up to 2 months
• Wrap individually before freezing
To reheat, place the shells in an oven at 325°F for about 15 minutes until heated through. Covering the tray with foil prevents the bacon from over browning. A small brush of barbecue sauce before reheating helps restore moisture.
Frozen shells should thaw overnight in the refrigerator before reheating to maintain texture and flavor.
Nutrition and Cost Considerations
Although smoked shotgun shells are considered a party appetizer, it helps to understand their approximate nutritional content and preparation cost. Each shell typically contains protein from sausage and cheese along with carbohydrates from pasta.
A rough estimate per shell includes:
• Calories: about 220 to 260
• Protein: 12 to 15 grams
• Fat: 15 to 18 grams
• Carbohydrates: 8 to 10 grams
Costs vary depending on ingredient quality, but a full batch of twelve shells often costs less than many restaurant appetizers. Buying ingredients in bulk for large gatherings can reduce costs even further.
This balance of affordability and flavor explains why the recipe has become a favorite among barbecue enthusiasts.
Conclusion
Smoked shotgun shells combine smoky barbecue flavor with creamy cheese and savory meat inside tender pasta shells. The recipe is simple to prepare, yet it delivers impressive results for gatherings, game day snacks, and backyard cookouts. With the right stuffing technique, proper smoking temperature, and a flavorful sauce glaze, the shells cook evenly and develop rich barbecue taste. Preparing them ahead of time also makes the process easier for larger events. When made correctly, the smoked shotgun shell recipe becomes a memorable appetizer that guests enjoy sharing.
FAQs
What are smoked shotgun shells made of?
They are manicotti pasta tubes stuffed with sausage and cheese, wrapped in bacon, and smoked until tender.
How long do you smoke shotgun shells?
Most recipes cook them for about 90 minutes to 2 hours at 250°F.
Do you need to boil the pasta first?
Usually no. Letting stuffed shells rest overnight softens the pasta naturally.
What meat works best for the filling?
Italian sausage, ground beef, or chorizo are commonly used for rich flavor.
What wood is best for smoking shotgun shells?
Applewood, hickory, and pecan are popular choices because they provide balanced smoke flavor.
Can shotgun shells be made ahead of time?
Yes. Assemble them the day before and store in the refrigerator before smoking.
-

 Food6 days ago
What Is Andouille Sausage? Complete Guide
-

 Food6 days ago
Cuts of Steak: Complete Guide to Beef Cuts
-

 Food6 days ago
Black Pudding Guide: History, Recipe & Nutrition
-

 Food1 day ago
Shirleys Coffee Shop Guam Locations Menu and Guide
-

 Drinks6 days ago
Easy Lychee Martini Recipe Sweet & Floral Cocktail
-

 Food6 days ago
Ultimate Tripas Recipe and Cooking Guide
-

 Food2 days ago
Poisonous White Mushroom Identification Guide
-

 Food1 day ago
Peruvian Recipe Chicken: Pollo a la Brasa 15 Ways